Photo by Jeremy Bezanger on Unsplash
How to build a Twitter bot in JavaScript
In this guide, you will learn how to create and set up a Twitter bot.
Building a Twitter bot can be a cool side project to work on. In this blog post, I will teach you how you can build your very own Twitter bot and send simple messages. You might want to create a new twitter account for this.
Before we start coding anything we need to create a .env file that should look like this:
TWITTER_API_KEY=
TWITTER_API_SECRET=
TWITTER_ACCESS_TOKEN=
TWITTER_ACCESS_TOKEN_SECRET=
Now we need to fill these out so our bot can start. We can find all of the values on developer.twitter.com.
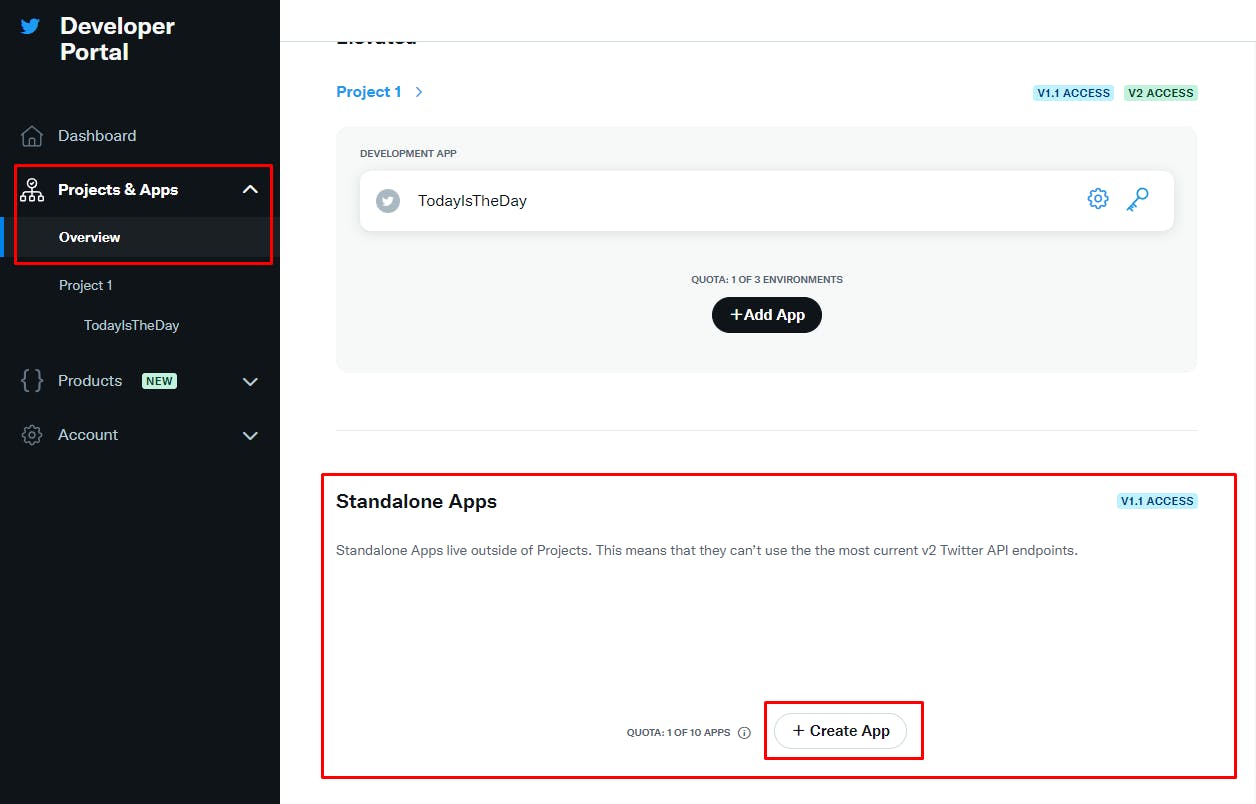
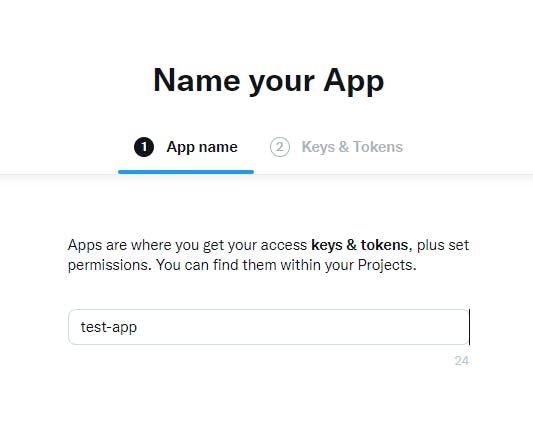
Open that site in a new tab and create a new app like in the pictures below:

Give your app a nice name

Now in the next step, we need to change the auth settings.

Click the black "set up" button and make sure the app permissions are set to Read and write.

Fill out the rest of the required fields and press save.
You will get a few new tokens here but you can ignore them for now. Head over to your newly created app and move to the "keys and tokens" tab to regenerate your API tokens. This is required since we changed it from Read to Read and write.
You now get new API keys that we can put into the env file.
TWITTER_API_KEY=API Key
TWITTER_API_SECRET=API Key Secret
Now we scroll down a tiny bit and generate an access token.

Copy these tokens into your env file like so:
TWITTER_ACCESS_TOKEN=Access Token
TWITTER_ACCESS_TOKEN_SECRET=Access Token Secret
Congrats, the env file is now done!
Now we can go ahead and create a new file called twit.js. This is necessary to initialize the client and log the account in.
const twit = require('twit');
require('dotenv').config();

const Client = new twit({
    consumer_key: process.env.TWITTER_API_KEY,
    consumer_secret: process.env.TWITTER_API_SECRET,
    access_token: process.env.TWITTER_ACCESS_TOKEN,
    access_token_secret: process.env.TWITTER_ACCESS_TOKEN_SECRET,
});

module.exports = Client;
We export client so we can use it in an index.js file that we will create now.
First of all, we require the twit file you can do so by doing:
const t = require('./twit');
Our bot is almost done just a few more lines.
In order for the bot to send something, we want to create a status update.
 t.post('statuses/update', { status:  "test tweet" }, function(err, data, response) {
 console.log(err)
})
Using this we can post anything we put in the status property. For example, I use a similar function to post a random holiday every day on my TodayIsThatDay bot. You can use additional packages like node-cron to send a message each day for example.
I hope you learned a thing or two from this. If you got any questions let me know!
