


The bot we are talking about is one of my main projects called "Would You" as the name suggests it's a would you rather type bot for the popular chatting application discord. The reason I decided to make this tool as a side project was to make it easy for everyday users to create custom config files with personalized questions without having to look at an ugly text editing tool writing JSON files by themselves.
The source code to this can be found here
1. What stacks did you use?
The whole app is quite simple we use HTML and CSS for the front end paired with vanilla javascript and jquery.
2. The HTML
We want to start off without a head element including all the required libraries, CSS files, and the SEO optimizations
  <head>
    <meta charset="UTF-8" />
    <meta http-equiv="X-UA-Compatible" content="IE=edge" />
    <meta name="viewport" content="width=    , initial-scale=1.0" />
    <link rel="stylesheet" href="style.css" />
    <link rel="stylesheet" href="scrollbar.css" />
    <link rel="icon" type="image/x-icon" href="/favicon.ico" />
    <meta name="title" content="Would You - Json Generator" />
    <meta
      name="description"
      content="Create custom would you rather questions for our discord bot using this simple ui tool!"
    />
    <meta
      name="keywords"
      content="discord, bot, discord bot, would you rather, would you bot"
    />
    <meta name="robots" content="index, follow" />
    <meta http-equiv="Content-Type" content="text/html; charset=utf-8" />
    <meta name="language" content="English" />
    <meta name="revisit-after" content="7 days" />
    <link
      rel="stylesheet"
      href="https://cdnjs.cloudflare.com/ajax/libs/highlight.js/11.6.0/styles/default.min.css"
    />
    <script src="https://cdnjs.cloudflare.com/ajax/libs/highlight.js/11.6.0/highlight.min.js"></script>
    <script src="https://cdnjs.cloudflare.com/ajax/libs/highlight.js/11.6.0/languages/go.min.js"></script>
    <title>Would You - Json Generator</title>
  </head>
As said we just require the basic libraries and some CSS styling here to make the website look good.
After this mess we create the input forms where we will get the data from:
    <div class="containerbox">
      <div class="containermain">
        <div id="headings">
          <h1 id="first-h">Would You</h1>
          <h2>JSON Generator</h2>
        </div>

        <h3>
          Generate would you rather import files using this UI! Press the +
          button to add more!
        </h3>
        <div id="cont-div">
          <div id="container">
            <h2>Useful👍</h2>
            <div id="containeruseful" class="list">
              <div class="oneline">
                <input type="text" />
                <button id="addbtn1">+</button>
              </div>
            </div>
          </div>
          <div id="container">
            <h2>Useless👎</h2>
            <div id="containeruseless" class="list">
              <div class="oneline">
                <input type="text" />
                <button id="addbtn2">+</button>
              </div>
            </div>
          </div>
          <div id="container">
            <h2>NSFW🔞</h2>
            <div id="containernsfw" class="list">
              <div class="oneline">
                <input type="text" />
                <button id="addbtn3">+</button>
              </div>
            </div>
          </div>
        </div>

        <button id="generatebtn">Generate JSON file</button>
        <button id="previewbtn">Preview JSON</button>

        <pre hidden><code class="language-json" id="preview-window"></code></pre>
      </div>
    </div>
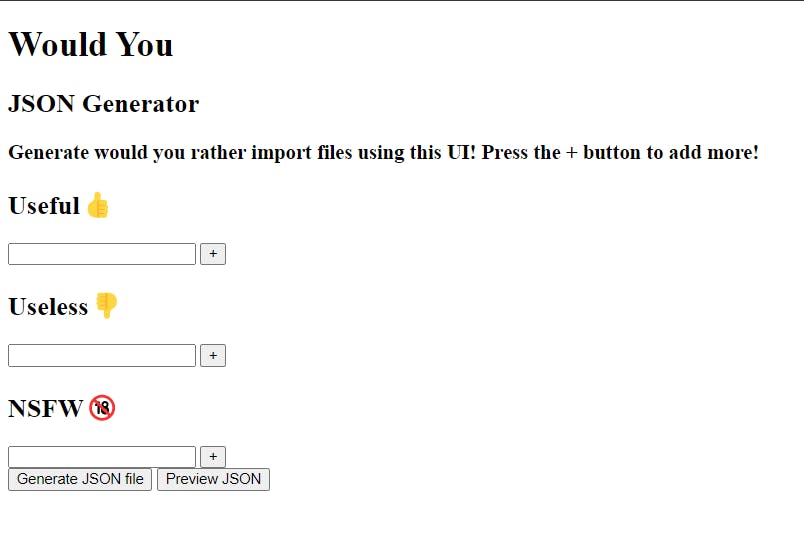
As you can see we added a hidden code tag at the end:
<pre hidden><code class="language-json" id="preview-window"></code></pre>
This is used to display a preview of the file before exporting the final product.
3. The Styling 😎
Now onto the CSS, we wanted to start off with our scroll bar.
::-webkit-scrollbar {
    width: 10px;
  }

  /* Track */
  ::-webkit-scrollbar-track {
    background: #151515;
  }

  /* Handle */
  ::-webkit-scrollbar-thumb {
    background: #888;
    border-radius: 2px;
  }

  /* Handle on hover */
  ::-webkit-scrollbar-thumb:hover {
    background: #555;
  }
This basically just replaces the standard ugly scroll bar with a clean and pretty one.
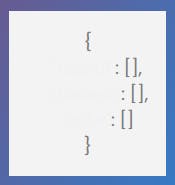
Now our main website still looks like this:
Now we want to add some basic CSS styling to make the site more pleasing to our eye and get rid of the light mode. In order to achieve this we add the following code:
* {
    text-decoration: none;
    color: #f1f1f1;
    font-family: 'Poppins', sans-serif;
}

body {
    background-color: #151515;
    text-align: center;
}
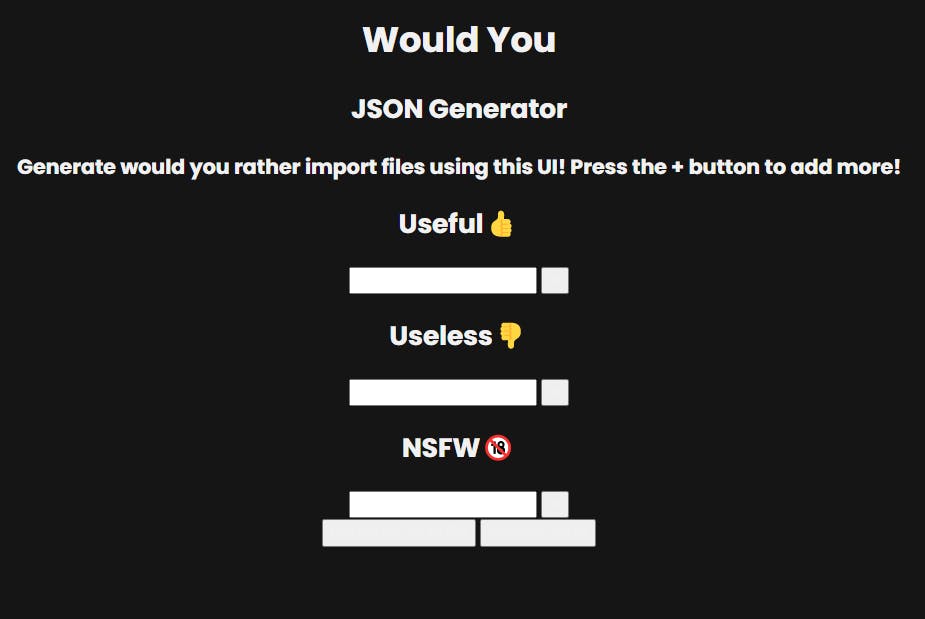
We set the body background color to a darker grey tone. We also set the font to something better looking than the standard font and remove any text decorations.
Our tool now looks something like this
Already much better but not quite perfect yet.
Now let us add a bit of styling to our headings
#headings h1,
#headings h2 {
    margin: 0px;
}

#headings {
    display: flex;
    flex-wrap: wrap;
    flex-direction: column;
}
This just adds a bit more spacing between the headings.
What the tool needs is some more color. Let us add a box and give it some styling as well.
.containerbox {
    background-image: linear-gradient(to bottom right, #f00708 , #0697f4 );
    display: flex;
    width: 40rem;
    min-height: 40rem;
    align-items: center;
    justify-content: center;
    left: 50%;
    transform: translate(-50%, 0%);
    border-radius: 50px;
    margin-top: 50px;
    margin-bottom: 40px;
    position: relative;
}

.containermain {
    display: flex;
    width: 400px;
    top: 50%;
    left: 50%;
    align-items: center;
    justify-content: center;
    flex-wrap: wrap;
    margin: 20px 0px;
    flex-direction: column;
}
For the colors, we choose the 2 primary colors of our bot logo #f00708 and #0697f4
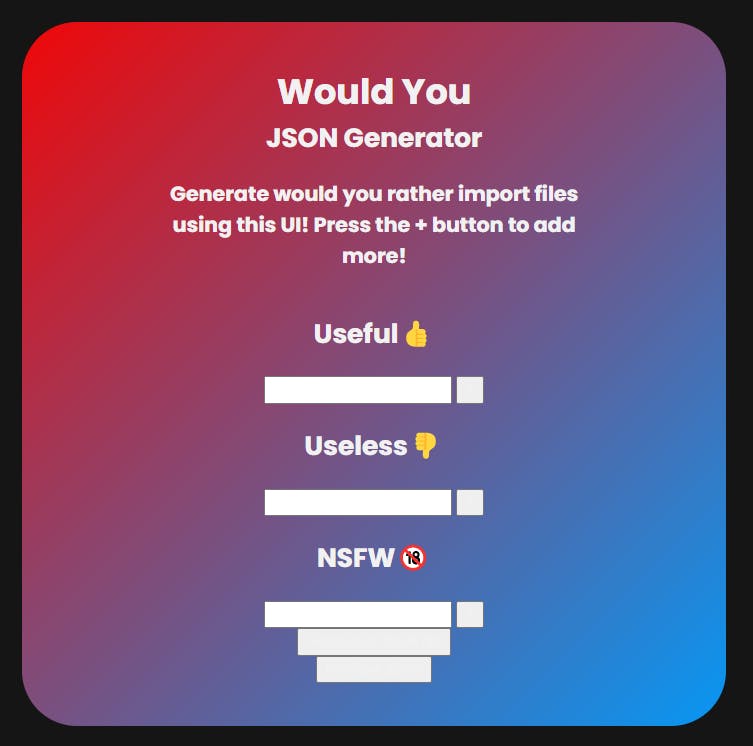
This looks already so much better than what we started off with.
Now its time to give our buttons some nice styling.
#generatebtn {
    background-color: transparent;
    padding: 14px 20px;
    margin: 20px 0;
    border: none;
    cursor: pointer;
    width: 100%;
    border: #f1f1f1 2px solid;
    border-radius: 50px;
    transition: all 0.9s ease;
}

#generatebtn:hover {
    border-radius: 10px;
    transition: all 0.5s ease;
}

#container input {
    color: #f1f1f1;
    background-color: #151515;
    border-radius: 4px;
    border: none;
    transition: all 0.9s;
    height: 23px;
    margin-top: 3px;
    padding: 2% 5%;
}

#container input:hover {
    color: #f1f1f1;
    background-color: #151515;
    border-radius: 15px;
    transition: all 0.9s;
}

#container button {
    color: #f1f1f1;
    cursor: pointer;
    background-color: transparent;
    border: none;
    font-size: 20px;
}

.container {
    background-color: #2c2c2c;
}

.list {
    display: flex;
    flex-wrap: wrap;
    align-items: flex-start;
    flex-direction: column;
}

.oneline {
    display: flex;
    flex-wrap: nowrap;
}

#previewbtn {
    background-color: transparent;
    padding: 14px 20px;
    margin: 20px 0;
    border: none;
    cursor: pointer;
    width: 70%;
    border: #f1f1f1 2px solid;
    border-radius: 50px;
    transition: all 0.9s ease;
}

#previewbtn:hover {
    border-radius: 10px;
    transition: all 0.5s ease;
}
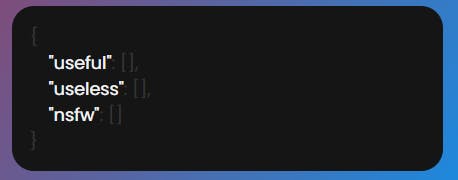
This will make our buttons look so much better and more readable as well as change up the input fields. Leaving us with this:
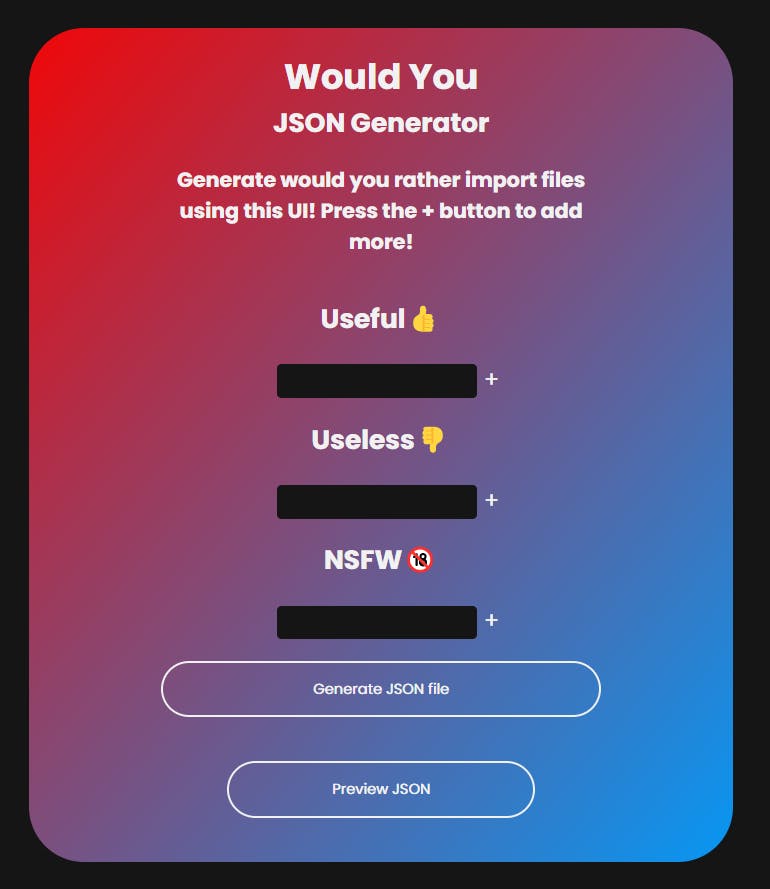
Remember that preview windows I mentioned earlier? Yea this is what it currently looks like.
To make this a bit prettier we just need to add a tiny bit of CSS.
#preview-window {
    border-radius: 20px;
    text-align: left;
    background-color: #151515;
    width: 360px;
}
After these little tweaks this is what it looks like now:
Now that's all the front-end code done this is how it looks now.
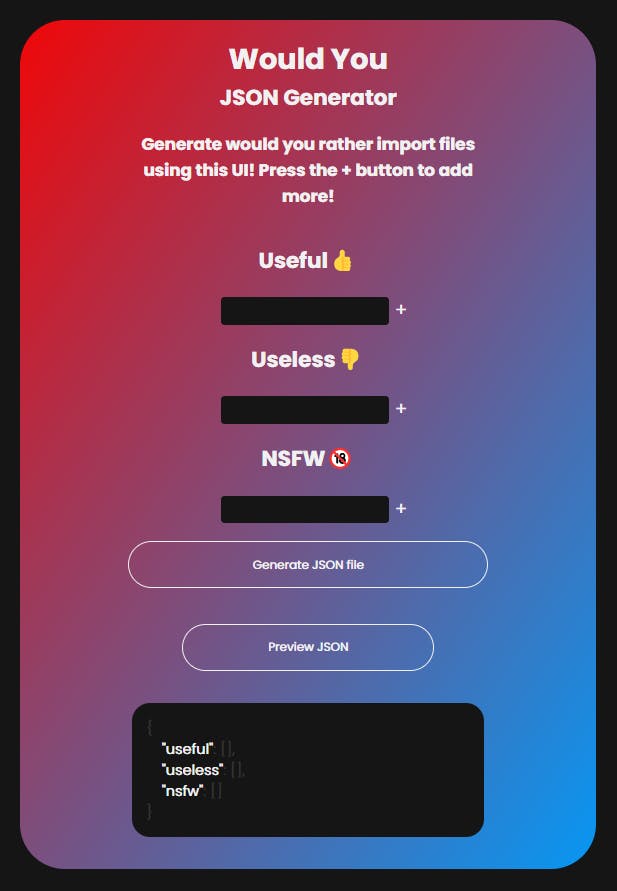
Pretty neat right?!?
4. The JavaScript
Now it's still without any function for that we need to add some javascript. I created a script.js that's linked to our main HTML file.
We will start off by creating a generateJson function.
function generateJson() {
  var arrayuseful = [];
  $("#containeruseful :input").each(function (e) {
    arrayuseful.push(this.value);
  });
  const filteruseful = arrayuseful.filter((a) => a);

  var arrayuseless = [];
  $("#containeruseless :input").each(function (e) {
    arrayuseless.push(this.value);
  });
  const filteruseless = arrayuseless.filter((a) => a);

  var arraynsfw = [];
  $("#containernsfw :input").each(function (e) {
    arraynsfw.push(this.value);
  });
  const filternsfw = arraynsfw.filter((a) => a);

  const finished = {
    useful: filteruseful,
    useless: filteruseless,
    nsfw: filternsfw,
  };

  return finished;
}
This uses jquery to get the content of each input and fill the array with that. We also use a filter to check if an input is empty so it won't add empty arrays to the final object.
Now we gotta add code for the download button. This will form the final object and let us download the freshly generated json file.
document.getElementById("generatebtn").onclick = function () {
  finished = generateJson();

  if(finished['useful'].length == 0) return alert("You need to add at least one question before exporting");

  const blob = new Blob([JSON.stringify(finished)], {
    type: "application/json",
  });
  const url = URL.createObjectURL(blob);
  const link = document.createElement("a");
  link.href = url;
  link.download = "wouldyou-export.json";
  link.click();
  setTimeout(() => {
    URL.revokeObjectURL(url);
  }, 100);
};
We use blob to generate a temporary file to download that gets revoked after 100ms. That's so we don't need to store any files on our server.
Since we want the users to add more than 1 input to their arrays we gotta make the + buttons functional. We can do so with this little code:
document.getElementById("addbtn1").onclick = function () {
  const inputs = document.querySelectorAll("#containeruseful input");
  var lastInput = inputs.item(inputs.length - 1);

  if(lastInput.value) {
    createInput("containeruseful", inputs[0].value);
    inputs[0].value = ""
  }
};
document.getElementById("addbtn2").onclick = function () {
  const inputs = document.querySelectorAll("#containeruseless input");
  var lastInput = inputs.item(inputs.length-1);
  if(lastInput.value) {
    createInput("containeruseless", inputs[0].value);
    inputs[0].value = ""
  }
};
document.getElementById("addbtn3").onclick = function () {
  const inputs = document.querySelectorAll("#containernsfw input");
  var lastInput = inputs.item(inputs.length - 1);

  if (lastInput.value) {
    createInput("containernsfw", inputs[0].value);
    inputs[0].value = ""
  }
};
It's almost the same for every button we check if the last input is empty and if so we don't let the user add another one. If it's filled with text though we add another HTML element over the existing inputs.
Congrats our discord tool is almost done all we need to add now is the function for the preview button.
function createInput(id, lastKnownValue) {
  if(!lastKnownValue) {return}
  refreshPreview();
  const container = document.getElementById(id);
  const input = document.createElement("input");
  input.type = "text";
  input.value = lastKnownValue;
  container.append(input)
}

document.getElementById("previewbtn").onclick = function() {refreshPreview(true)}

function refreshPreview(changeState=false) {
  const json = JSON.stringify(generateJson(), undefined, 4);
  var preview = document.getElementById("preview-window");
  if (changeState) {
    preview.parentElement.hidden = !preview.parentElement.hidden;
  }
  preview.innerHTML = json;
  hljs.highlightAll();
}
This opens the preview section and highlights the preview using a special highlight library we required in our index.html file.
5. Summary
Here is a quick summary of all the code we wrote today so you can just copy-paste it all.
index.html
<!DOCTYPE html>
<html lang="en">
  <head>
    <meta charset="UTF-8" />
    <meta http-equiv="X-UA-Compatible" content="IE=edge" />
    <meta name="viewport" content="width=    , initial-scale=1.0" />
    <link rel="stylesheet" href="scrollbar.css" />
    <link rel="stylesheet" href="style.css" />
    <link rel="icon" type="image/x-icon" href="/favicon.ico" />
    <meta name="title" content="Would You - Json Generator" />
    <meta
      name="description"
      content="Create custom would you rather questions for our discord bot using this simple ui tool!"
    />
    <meta
      name="keywords"
      content="discord, bot, discord bot, would you rather, would you bot"
    />
    <meta name="robots" content="index, follow" />
    <meta http-equiv="Content-Type" content="text/html; charset=utf-8" />
    <meta name="language" content="English" />
    <meta name="revisit-after" content="7 days" />
    <link
      rel="stylesheet"
      href="https://cdnjs.cloudflare.com/ajax/libs/highlight.js/11.6.0/styles/default.min.css"
    />
    <script src="https://cdnjs.cloudflare.com/ajax/libs/highlight.js/11.6.0/highlight.min.js"></script>
    <script src="https://cdnjs.cloudflare.com/ajax/libs/highlight.js/11.6.0/languages/go.min.js"></script>
    <title>Would You - Json Generator</title>
  </head>
  <body>


    <div class="containerbox">
      <div class="containermain">
        <div id="headings">
          <h1 id="first-h">Would You</h1>
          <h2>JSON Generator</h2>
        </div>

        <h3>
          Generate would you rather import files using this UI! Press the +
          button to add more!
        </h3>
        <div id="cont-div">
          <div id="container">
            <h2>Useful👍</h2>
            <div id="containeruseful" class="list">
              <div class="oneline">
                <input type="text" />
                <button id="addbtn1">+</button>
              </div>
            </div>
          </div>
          <div id="container">
            <h2>Useless👎</h2>
            <div id="containeruseless" class="list">
              <div class="oneline">
                <input type="text" />
                <button id="addbtn2">+</button>
              </div>
            </div>
          </div>
          <div id="container">
            <h2>NSFW🔞</h2>
            <div id="containernsfw" class="list">
              <div class="oneline">
                <input type="text" />
                <button id="addbtn3">+</button>
              </div>
            </div>
          </div>
        </div>

        <button id="generatebtn">Generate JSON file</button>
        <button id="previewbtn">Preview JSON</button>

        <pre hidden><code class="language-json" id="preview-window"></code></pre>
      </div>
    </div>

    <script src="https://ajax.googleapis.com/ajax/libs/jquery/3.6.1/jquery.min.js"></script>
    <script src="script.js"></script>
  </body>
</html>
scrollbar.css
::-webkit-scrollbar {
    width: 10px;
  }

  /* Track */
  ::-webkit-scrollbar-track {
    background: #151515;
  }

  /* Handle */
  ::-webkit-scrollbar-thumb {
    background: #888;
    border-radius: 2px;
  }

  /* Handle on hover */
  ::-webkit-scrollbar-thumb:hover {
    background: #555;
  }
style.css
/* Language: css */
/* Path: style.css */
* {
    text-decoration: none;
    color: #f1f1f1;
    font-family: 'Poppins', sans-serif;
}

body {
    background-color: #151515;
    text-align: center;
}

#headings h1,
#headings h2 {
    margin: 0px;
}

#headings {
    display: flex;
    flex-wrap: wrap;
    flex-direction: column;
}

.containerbox {
    background-image: linear-gradient(to bottom right, #f00708 , #0697f4 );
    display: flex;
    width: 40rem;
    min-height: 40rem;
    align-items: center;
    justify-content: center;
    left: 50%;
    transform: translate(-50%, 0%);
    border-radius: 50px;
    margin-top: 50px;
    margin-bottom: 40px;
    position: relative;
}

.containermain {
    display: flex;
    width: 400px;
    top: 50%;
    left: 50%;
    align-items: center;
    justify-content: center;
    flex-wrap: wrap;
    margin: 20px 0px;
    flex-direction: column;
}

#generatebtn {
    background-color: transparent;
    padding: 14px 20px;
    margin: 20px 0;
    border: none;
    cursor: pointer;
    width: 100%;
    border: #f1f1f1 2px solid;
    border-radius: 50px;
    transition: all 0.9s ease;
}

#generatebtn:hover {
    border-radius: 10px;
    transition: all 0.5s ease;
}

#container input {
    color: #f1f1f1;
    background-color: #151515;
    border-radius: 4px;
    border: none;
    transition: all 0.9s;
    height: 23px;
    margin-top: 3px;
    padding: 2% 5%;
}

#container input:hover {
    color: #f1f1f1;
    background-color: #151515;
    border-radius: 15px;
    transition: all 0.9s;
}

#container button {
    color: #f1f1f1;
    cursor: pointer;
    background-color: transparent;
    border: none;
    font-size: 20px;
}

.container {
    background-color: #2c2c2c;
}

.list {
    display: flex;
    flex-wrap: wrap;
    align-items: flex-start;
    flex-direction: column;
}

.oneline {
    display: flex;
    flex-wrap: nowrap;
}

#previewbtn {
    background-color: transparent;
    padding: 14px 20px;
    margin: 20px 0;
    border: none;
    cursor: pointer;
    width: 70%;
    border: #f1f1f1 2px solid;
    border-radius: 50px;
    transition: all 0.9s ease;
}

#previewbtn:hover {
    border-radius: 10px;
    transition: all 0.5s ease;
}

#preview-window {
    border-radius: 20px;
    text-align: left;
    background-color: #151515;
    width: 360px;
}
script.js
function generateJson() {
  var arrayuseful = [];
  $("#containeruseful :input").each(function (e) {
    arrayuseful.push(this.value);
  });
  const filteruseful = arrayuseful.filter((a) => a);

  var arrayuseless = [];
  $("#containeruseless :input").each(function (e) {
    arrayuseless.push(this.value);
  });
  const filteruseless = arrayuseless.filter((a) => a);

  var arraynsfw = [];
  $("#containernsfw :input").each(function (e) {
    arraynsfw.push(this.value);
  });
  const filternsfw = arraynsfw.filter((a) => a);

  const finished = {
    useful: filteruseful,
    useless: filteruseless,
    nsfw: filternsfw,
  };

  return finished;
}

document.getElementById("generatebtn").onclick = function () {
  finished = generateJson();

  if(finished['useful'].length == 0) return alert("You need to add at least one question before exporting");

  const blob = new Blob([JSON.stringify(finished)], {
    type: "application/json",
  });
  const url = URL.createObjectURL(blob);
  const link = document.createElement("a");
  link.href = url;
  link.download = "wouldyou-export.json";
  link.click();
  setTimeout(() => {
    URL.revokeObjectURL(url);
  }, 100);
};

document.getElementById("addbtn1").onclick = function () {
  const inputs = document.querySelectorAll("#containeruseful input");
  var lastInput = inputs.item(inputs.length - 1);

  if(lastInput.value) {
    createInput("containeruseful", inputs[0].value);
    inputs[0].value = ""
  }
};
document.getElementById("addbtn2").onclick = function () {
  const inputs = document.querySelectorAll("#containeruseless input");
  var lastInput = inputs.item(inputs.length-1);
  if(lastInput.value) {
    createInput("containeruseless", inputs[0].value);
    inputs[0].value = ""
  }
};
document.getElementById("addbtn3").onclick = function () {
  const inputs = document.querySelectorAll("#containernsfw input");
  var lastInput = inputs.item(inputs.length - 1);

  if (lastInput.value) {
    createInput("containernsfw", inputs[0].value);
    inputs[0].value = ""
  }
};
function createInput(id, lastKnownValue) {
  if(!lastKnownValue) {return}
  refreshPreview();
  const container = document.getElementById(id);
  const input = document.createElement("input");
  input.type = "text";
  input.value = lastKnownValue;
  container.append(input)
}

document.getElementById("previewbtn").onclick = function() {refreshPreview(true)}

function refreshPreview(changeState=false) {
  const json = JSON.stringify(generateJson(), undefined, 4);
  var preview = document.getElementById("preview-window");
  if (changeState) {
    preview.parentElement.hidden = !preview.parentElement.hidden;
  }
  preview.innerHTML = json;
  hljs.highlightAll();
}
Feel free to copy all the code and use it for your own projects or if you want open a pull request on our GitHub with any improvements you might have!
6. Finished!
Now our app is basically done if you want a preview of what we build you can go to https://would-you-bot.github.io/json-generator/ and if you want to look at the source code you can do so here https://github.com/Would-You-Bot/json-generator
If you want you can also join our discord server if you have any questions!